Three-Layer Closure with Quill Barbed Suture in a TKA Procedure
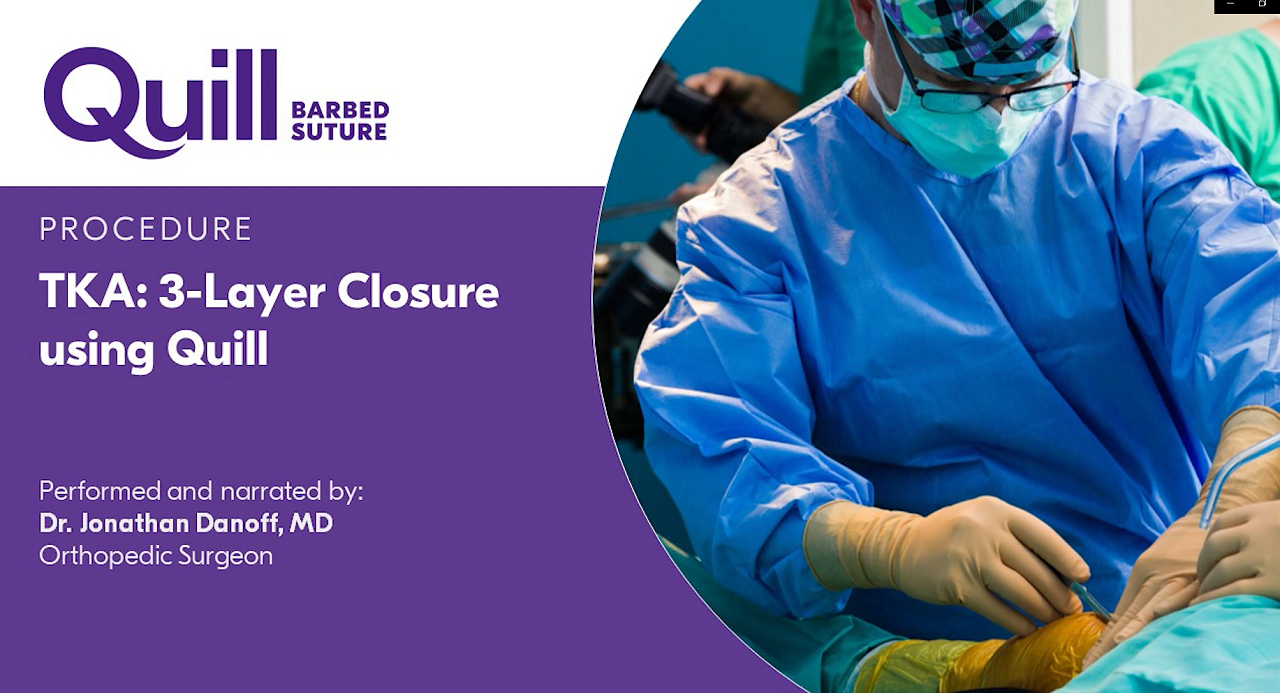
Three-Layer Closure with Quill Barbed Suture in a TKA Procedure
In this case study, Dr. Danoff demonstrates his surgical technique using Quill Barbed Suture to accelerate closure time during a total knee arthroplasty.
Closure after a primary total knee arthroplasty
“The wound is irrigated using a solution of your choice. In this case, we choose to use a betadine irrigation followed by a one liter of normal saline irrigation wash. The wound closure then proceeds starting with a size 1 Vicryl on a CPX needle.”
“I use two figure of eight sutures at the distal aspect of the wound followed by two figure of eight interrupted sutures at the proximal aspect of the wound. This is done to offload the tension at the ends of your surgical exposure prior to using a size 2 Quill PDO suture.”
“To facilitate exposure of the proximal aspect of the wound, the knee is bent. A sharp tenaculum is placed at the proximal aspect of the quadriceps tendon, which allows for approximation of the tendon and retraction to expose the proximal aspect of the wound. Two figure of eight sutures are passed in an interrupted fashion at the proximal aspect approximating the tendon.”
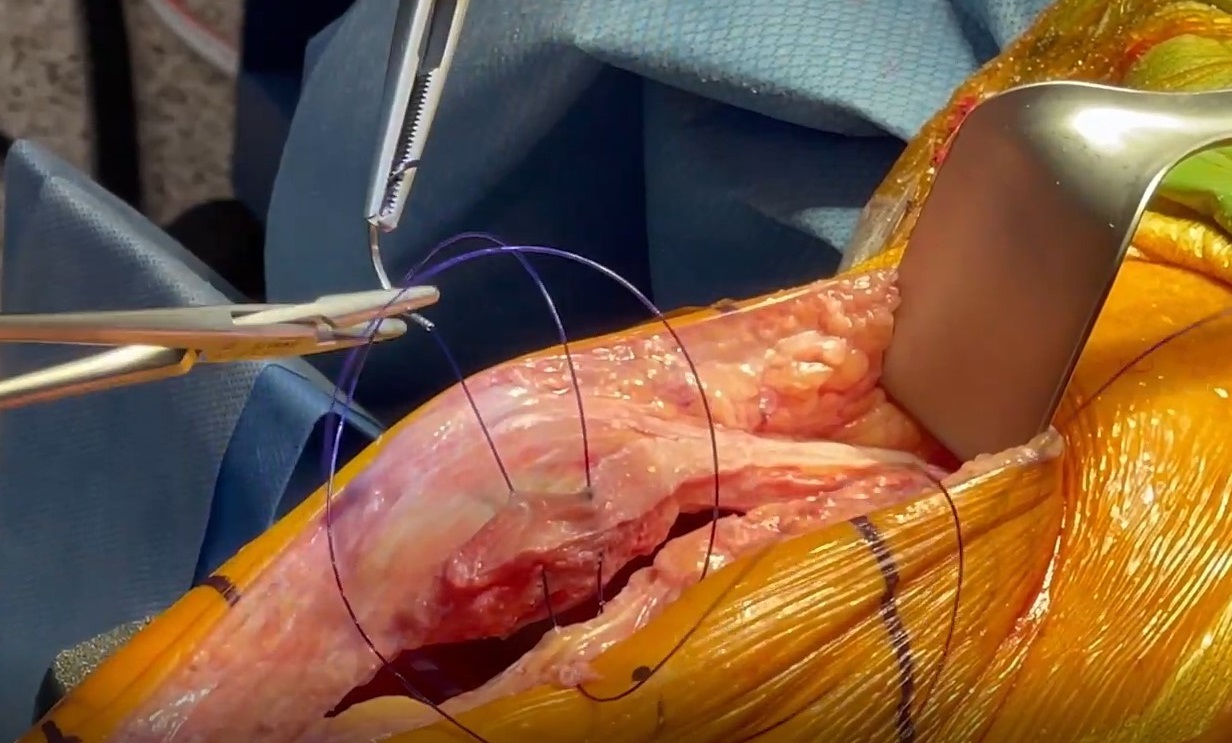
Capsule closure
“A bi-directional size 2 Quill PDO with a CP needle at each end (RX-2066Q), is utilized to approximate the tendon and retinaculum. Starting in the middle portion of the wound, the needle is passed until it is tensioned, such that you can feel the barbs switching from one direction to the other. This indicates the mid-point of the suture.”
“The advantage of using a bi-directional suture is that the primary surgeon and the first assistant can simultaneously commence with closure of the capsule in each direction. This will help speed up the rate at which the closure is performed.”
“The closure proceeds one end proximal and one end distal, until the ends of the surgical wound are closed. Then this is brought back up to the central portion of the wound where it initially started. I prefer to use the 45 x 45 centimeter Quill suture on a total knee closure as this will allow closure of the entire wound from central aspect of the wound distal and proximal and back to the initial starting point.”
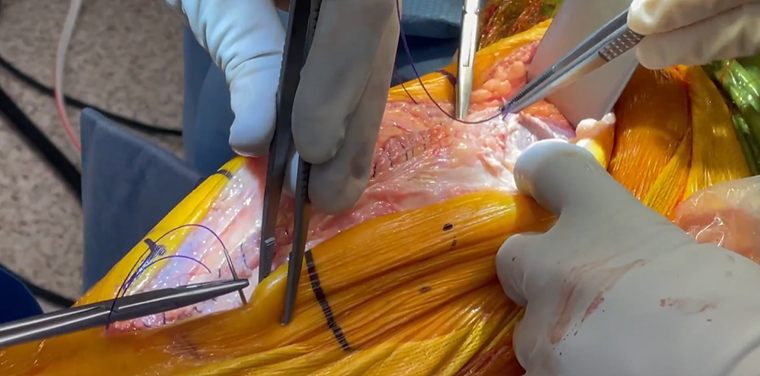
“The fascial layer of the adipose layer is identified and a size 1 Vicryl on a CPX needle is used in an interrupted fashion at five different locations of the knee. This will help to take some tension off of the final layer, which will be your subcutaneous and subcuticular layers.”
“At this point, it is our preference to remove some of the Ioban to help with the closure. A size 2-0 Monocryl suture on an SH needle is used in 5 to 7 locations about the surgical wound, that is evenly distributed, to approximate the subcutaneous tissue. This also helps to take tension off the final two layers which will be the subcutaneous and subcuticular layers. This allows the surgeon to fix any areas where the skin may not be perfectly aligned.”
Subcutaneous closure
“As we begin the subcutaneous closure, it is my preference to use a size 0 Monoderm Quill, uni-directional suture with an SH needle to approximate the subcutaneous tissue (VLM-1020). The closure starts at one end of the wound, being passed from one side to the other. The suture is passed through a lasso or loop, built into the uni-directional suture, and eliminates the need to create a surgical knot at a superficial layer of skin. This needle is then passed in a spiral type fashion at the subcutaneous layer to approximate the skin together. This is also done carefully to ensure there are no gaps that can be created between the closure.”
“I like to teach my residents and fellows that this should be performed at the same intervals where you would use a size 2-0 in an interrupted fashion. Except the advantage here, is you can have a continuous suture with less knot burden deep to the skin.”
“Another advantage noted by utilizing the Quill suture is because of the barbed nature of the suture, it evenly distributes the approximation forces to the skin throughout the surgical wound. Because of that, there is little gapping that occurs as the knee is flexed and extended, which further enhances and expedites the closure of the wound with less drainage. This also allows for improved cosmesis of the wound.”
“When the surgeon reaches the end of the wound, a knot does not need to be created, which again decreases the knot burden at the end of the skin. Instead, the suture can be passed at the apex of the wound deep and out the end of the skin, past the surgical wound.”
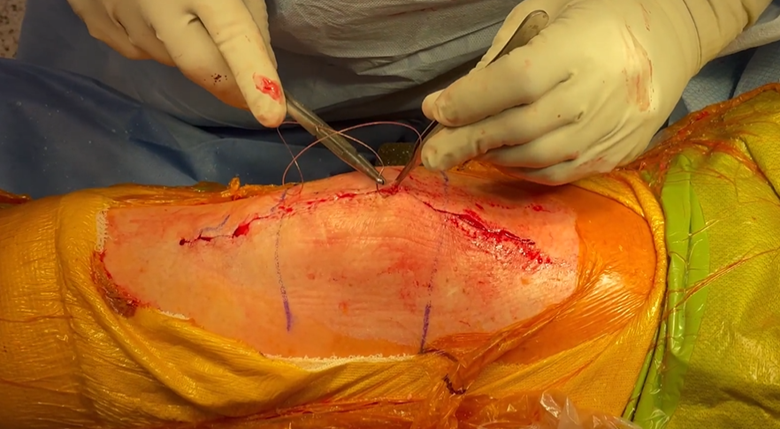
Subcuticular closure
“The final layer of closure then commences which is the subcuticular layer. It is my preference to use a size 2-0 Monoderm Quill uni-directional with a PS-1 needle (VLM-2012). Again, like the 2-0 Monoderm Quill that I used in the previous layer, this suture has a lasso or loop at the end which the needle can be passed through and again, this decreases the knot burden present in the wound. This is then passed in a horizontal fashion back and forth to each end of the wound to approximate the subcuticular tissue for improved cosmesis as well. As with the previous layer, when the end of the surgical wound is encountered, the needle can again be passed deep into the surgical wound and out the end of the skin to avoid creating a knot burden at the proximal aspect of the wound.”
“One must be careful not to over tension the suture as you’re passing from one side to another to avoid strangulation of the deep skin. Approximation of the ends of the skin are all that is needed in this closure technique. It is my preference to use a surgical glue to seal the wound, but you can choose any method that you prefer.”
“I have found this surgical technique to not only be beneficial in expediting the speed of the closure, but more importantly improving the cosmesis of the surgical wound.”
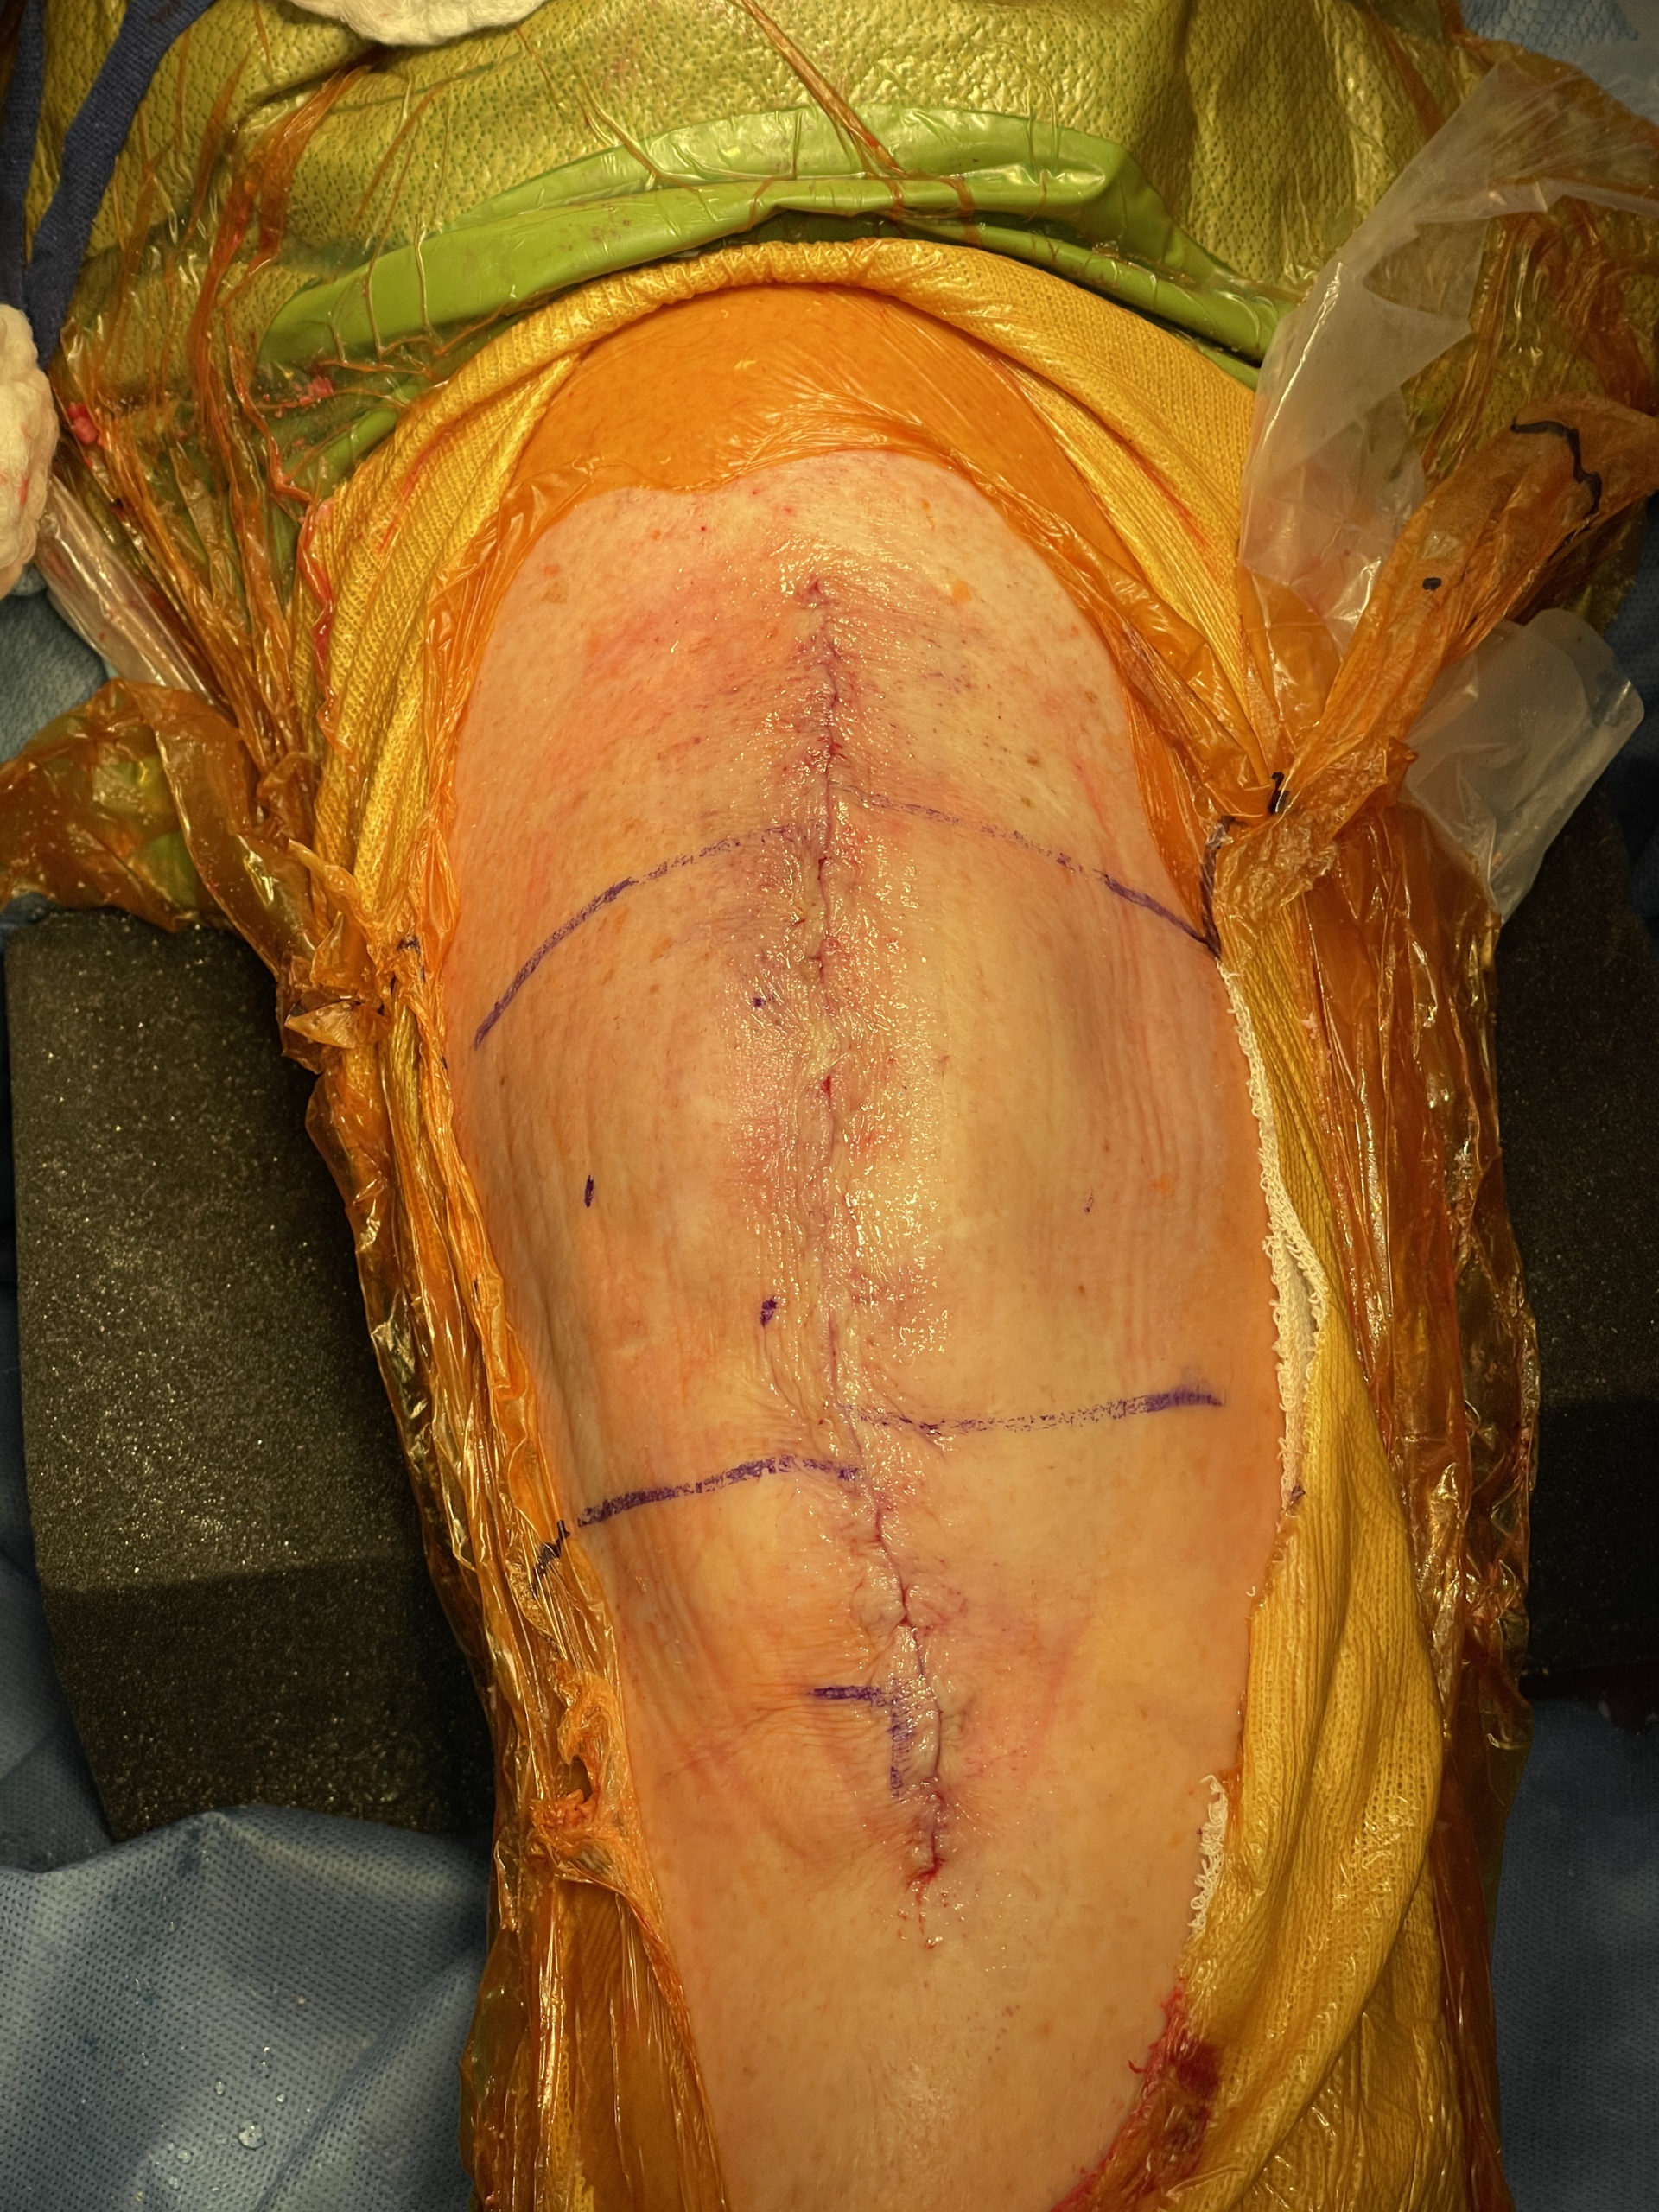
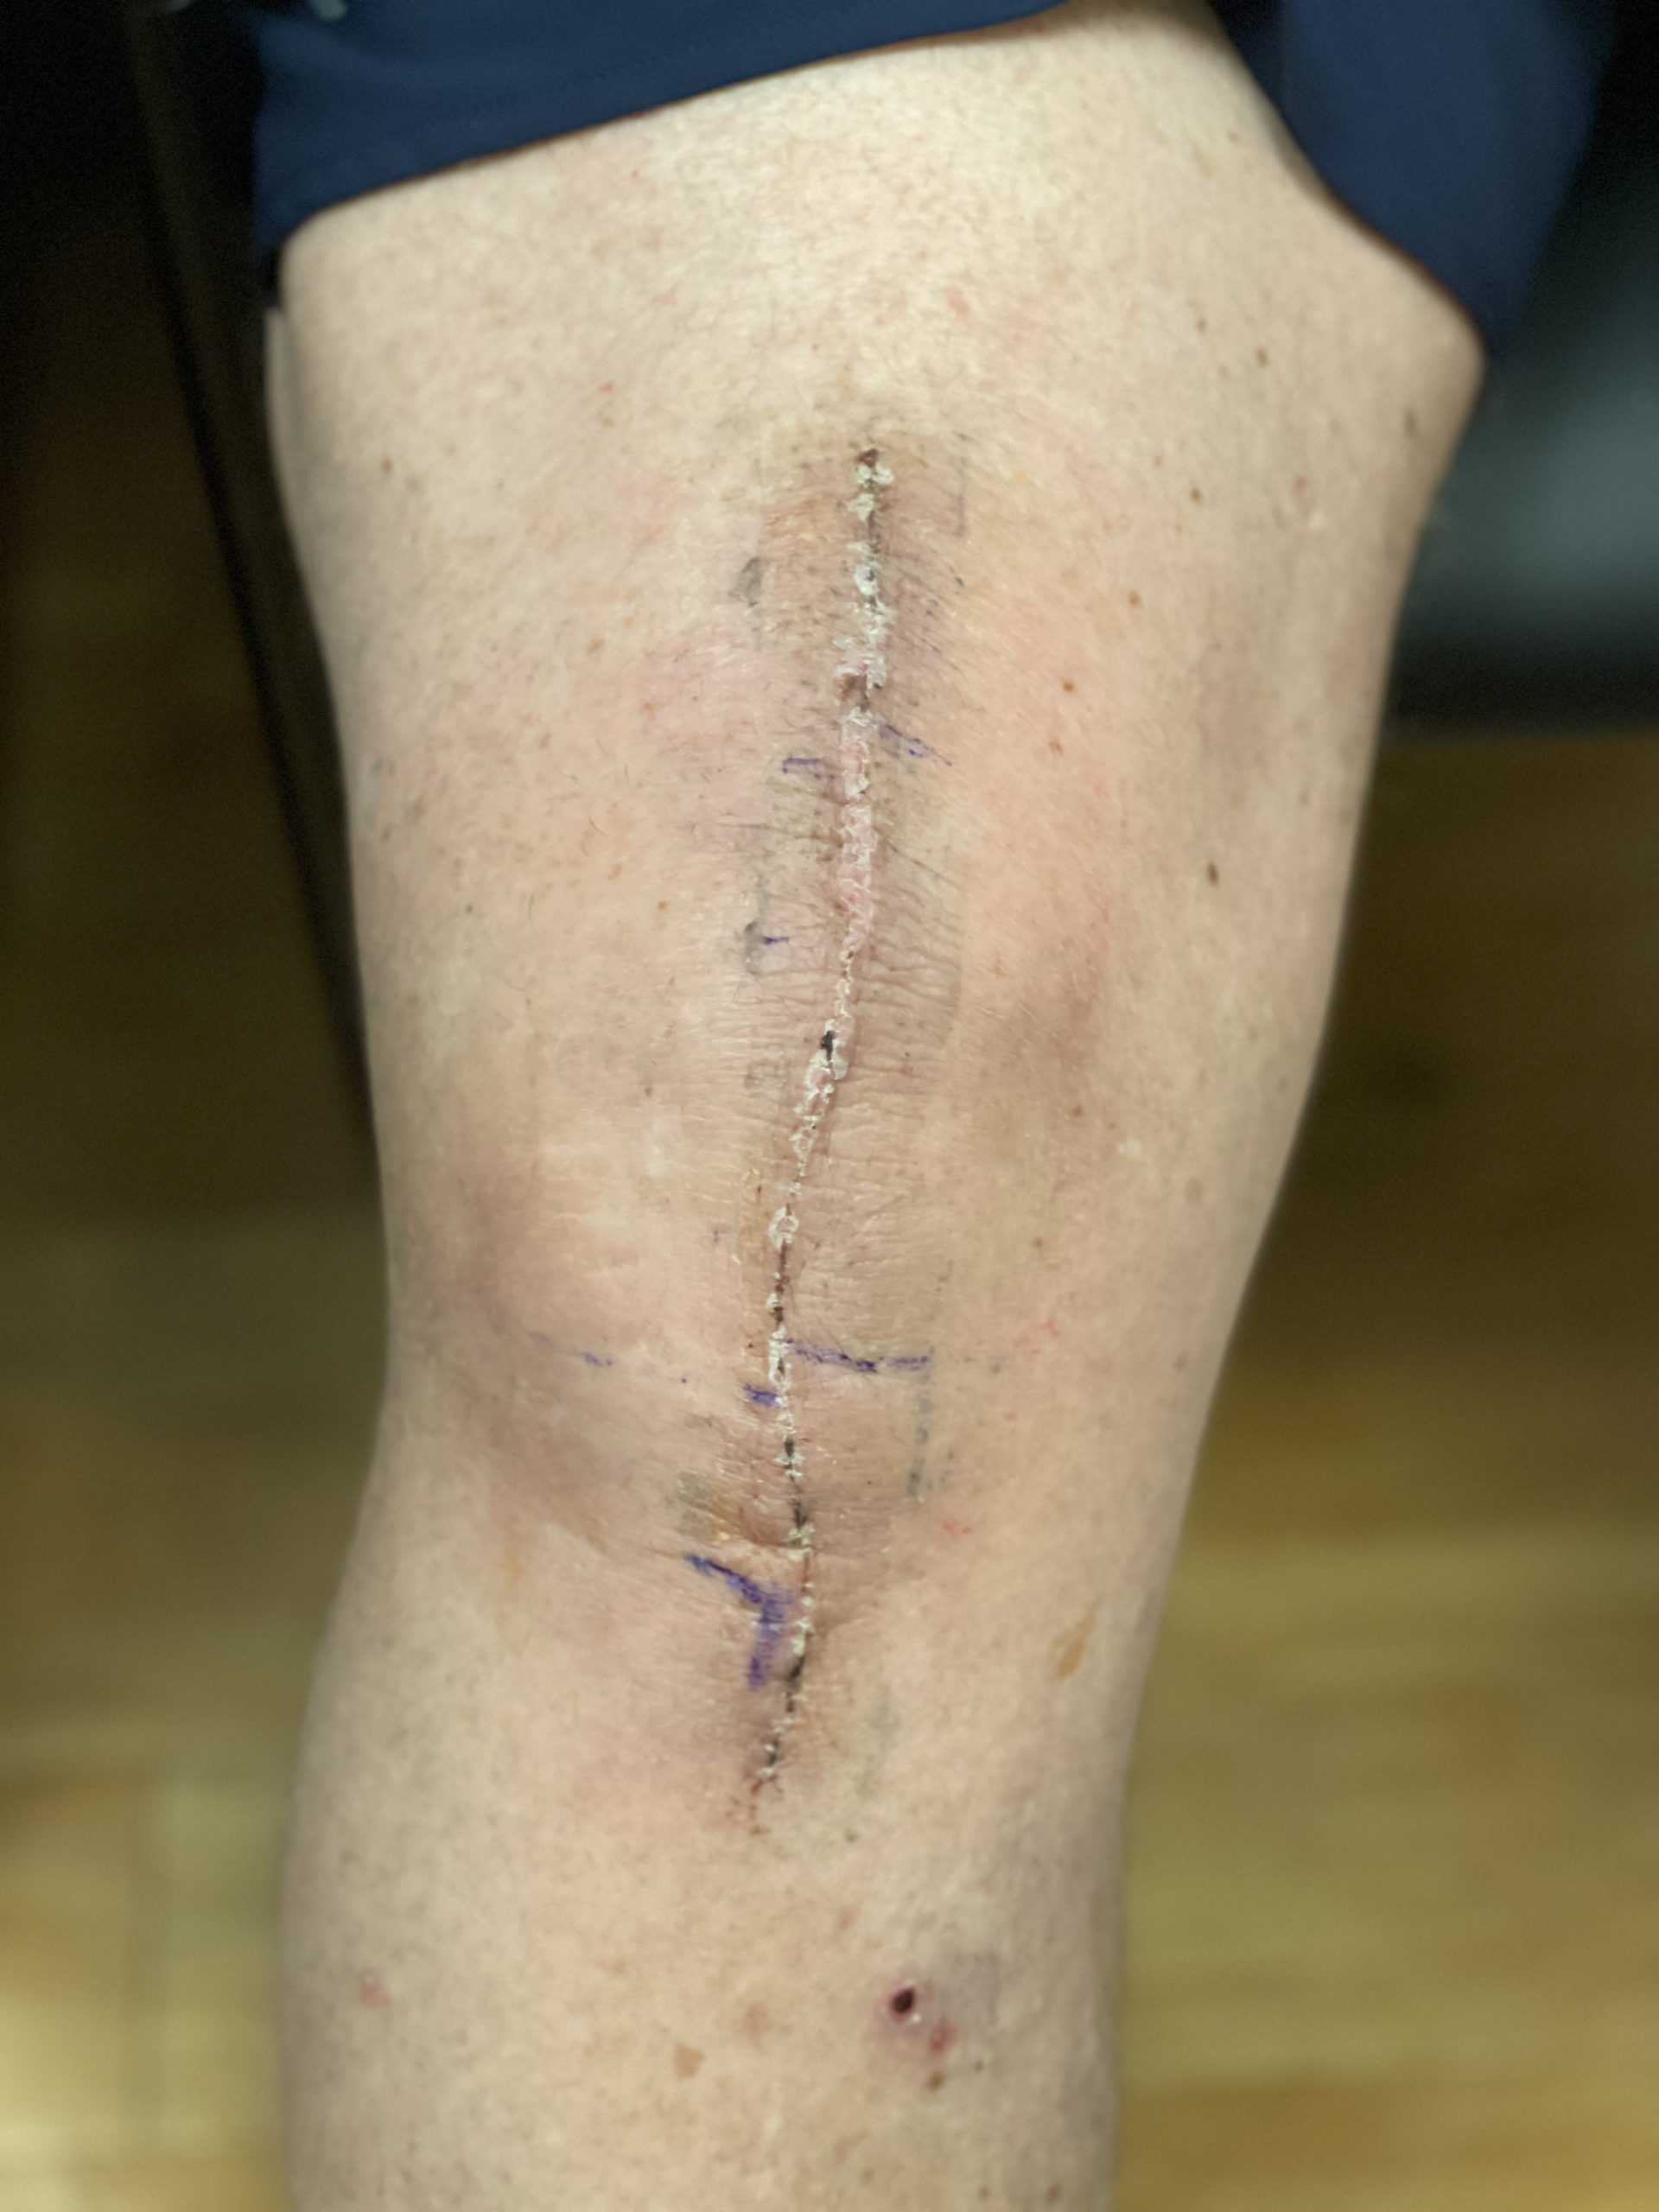
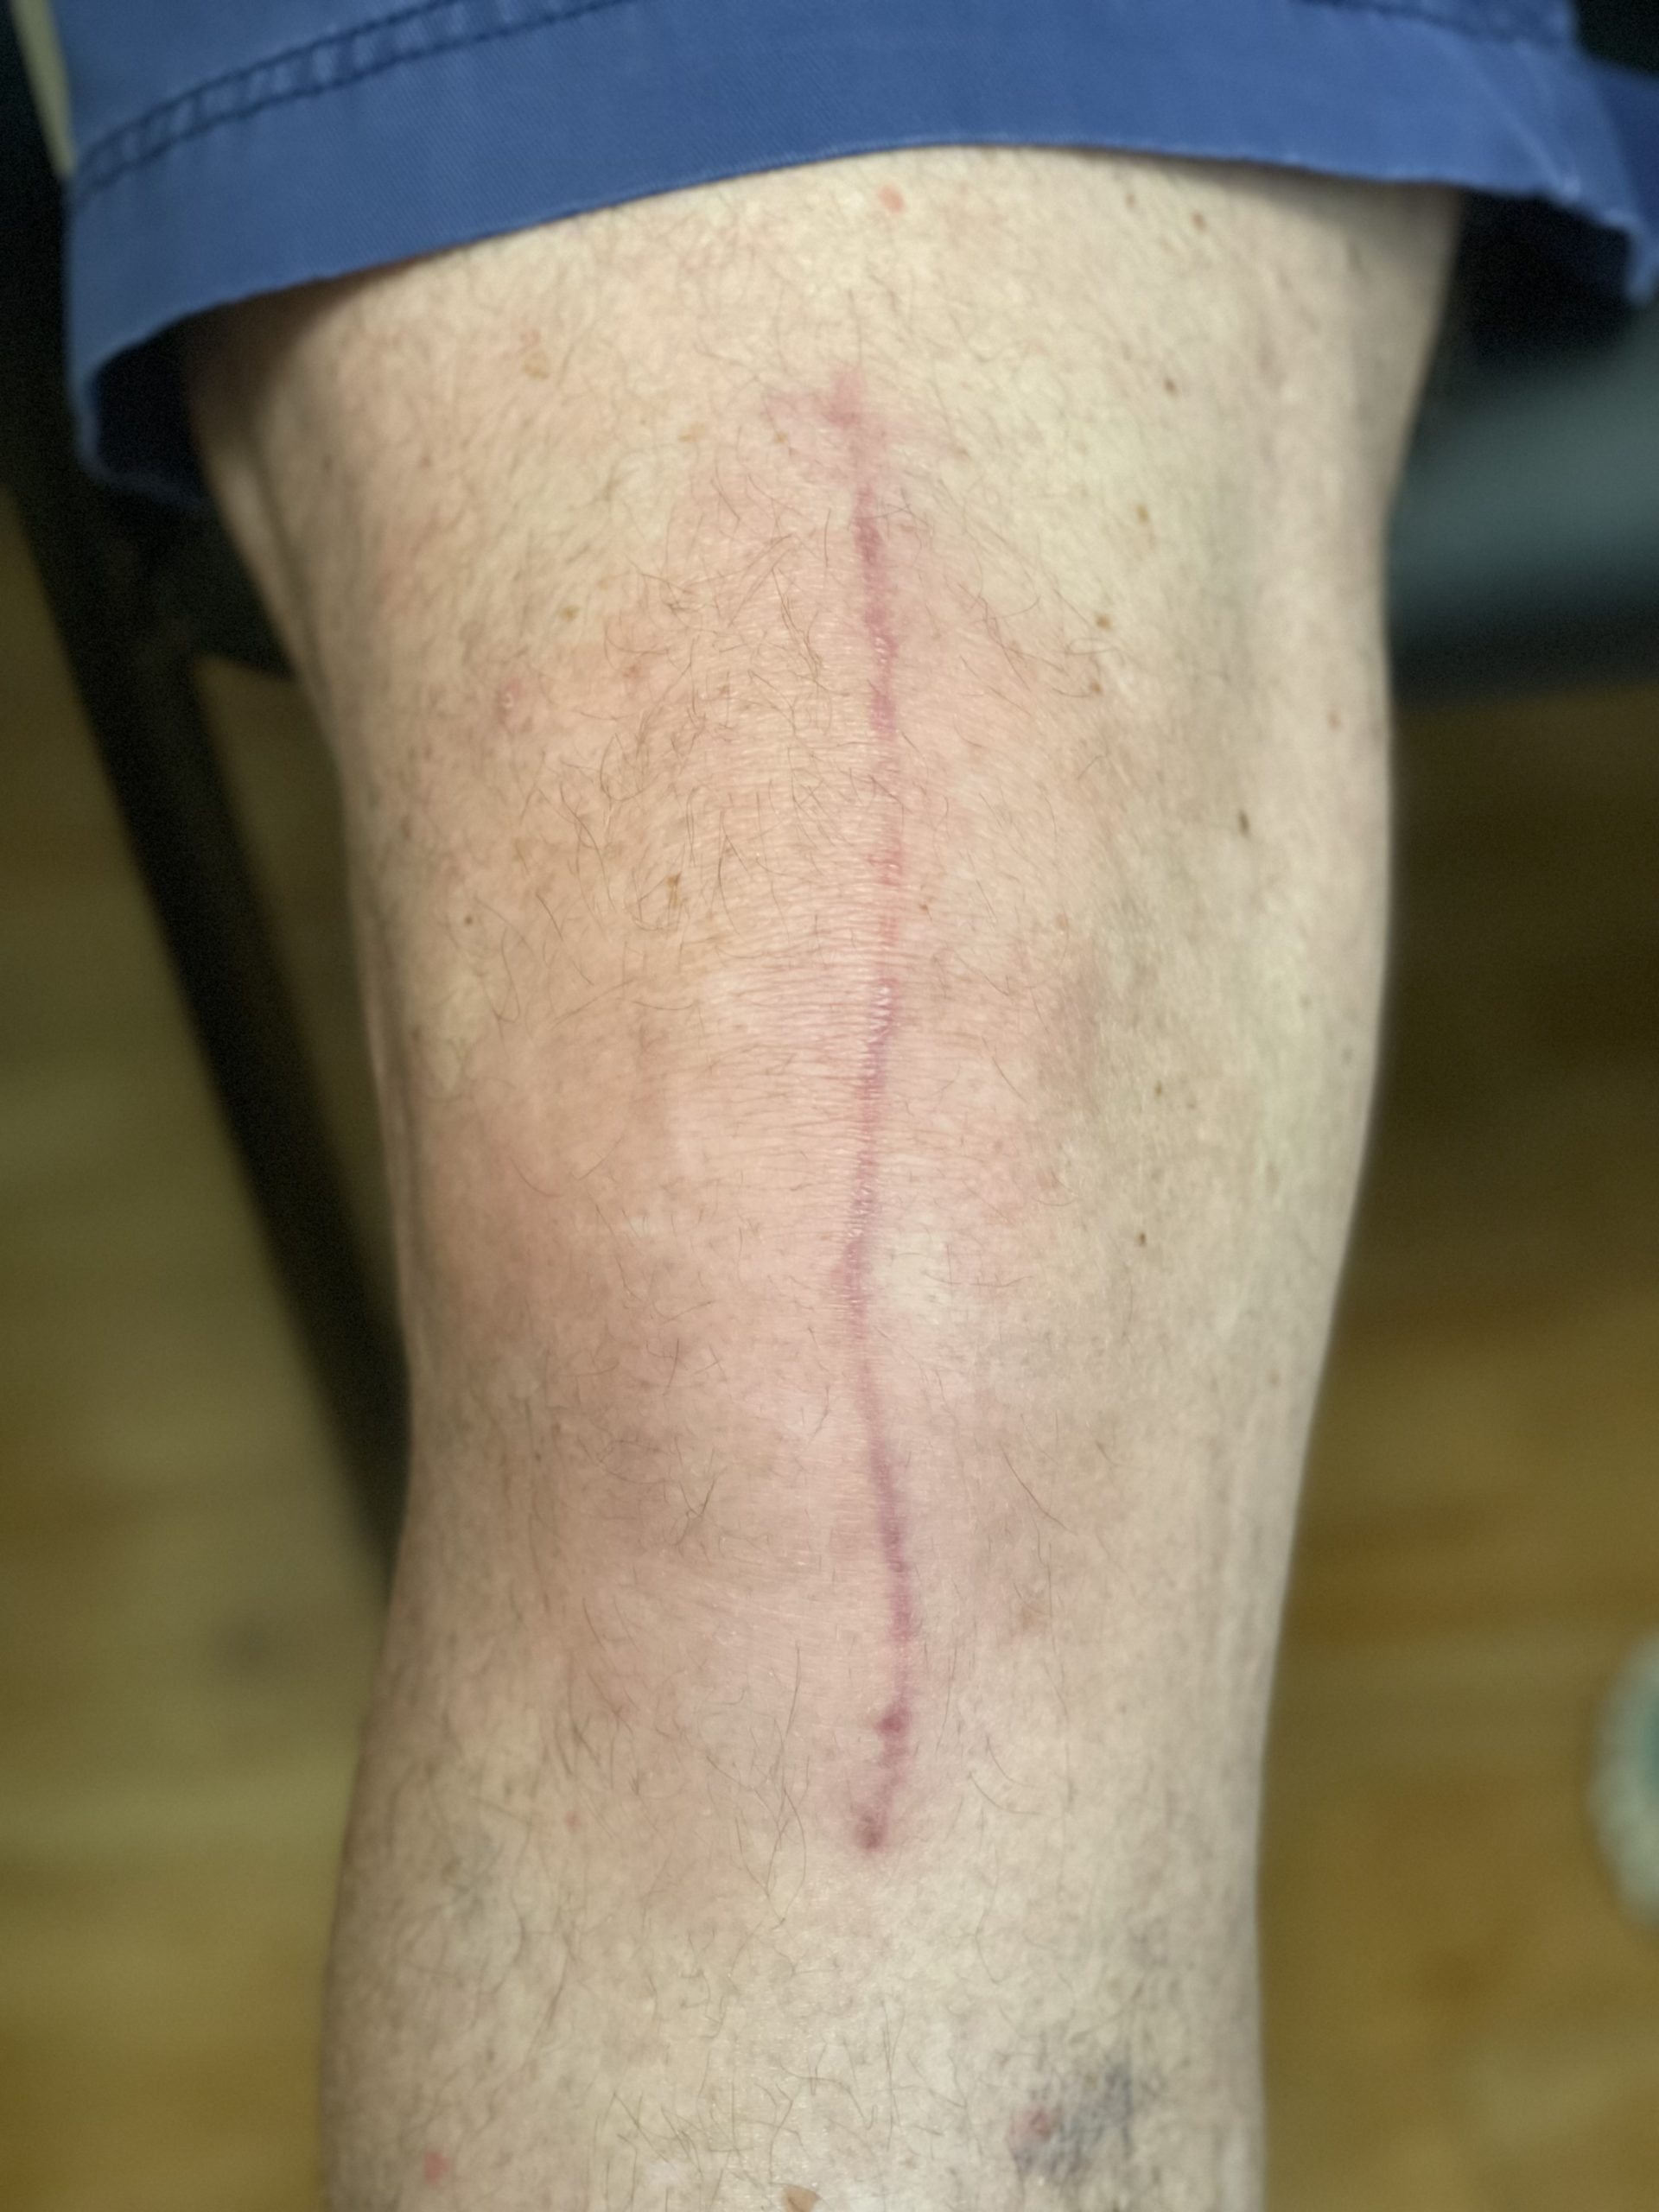
Results: before and after
Immediately after surgery
2 weeks after surgery
6 weeks after surgery
Closing remarks
“I have been utilizing this surgical technique for wound closure exclusively on all my patients. It is also an easy surgical technique that can be taught to your residents and fellows, as well as any other support staff that you may have, including PA’s or RNFA’s. I have found tremendous benefit not only for expediting and speeding up the surgical closure, but it has also decreased the costs in the operating room as multiple different additional sutures are no longer required. Most importantly the patients have had tremendous feedback as they are very pleased with their surgical wound which heals in a rapid fashion.”
Suture preference card
Procedure: Closure after TKA placement
- RX-2066Q: Quill PDO, 2, 45cm x 45cm, Violet, 1/2 Circle, Reverse Cutting, CP, Bi-Directional
- VLM-1020: Quill Monoderm, Undyed, 0, 45cm, Taper Point, SH, Uni-Directional
- VLM-2012: Quill Monoderm, Undyed, 2-0, 45cm, Precision Reverse Cutting, PS-1, Uni-Directional
- G535N: Sharpoint PolySyn, Undyed, 1, 27″(70cm), Reverse Cutting, OS-6
- Y417D: Sharpoint Monoderm, Undyed, 2-0, 27″ (70cm), Taper Point, SH